
The week before the race, my dad came up with the brilliant idea to put our call signs on coffee cup cozies. I worked really hard to get them done in time for the event, so we could show them off to all the other hams that would be there. Here are the final products:


I had a hard time deciding on how to do the lettering. At first I though I would just paint them on. I've had bad experiences trying to make paint look good on felt. So I decided to try appliqué. I just recently started dabbling in appliqué. I had tried it once or twice before, but this project was a real challenge. All I can say is thank God for Wonder Under!
For those interested, I'll go ahead and outline the basic technique I used:
Iron the Wonder Under onto the back side of a contrasting color fabric. Then cut the letters out and take the paper backing off.

Line up the letters on the right side of the cozy (or whatever you want to appliqué them to). Once you have them positioned how you want them, iron them in place.
Set your sewing machine to a small-medium zig-zag stitch. Simply zig-zag around the edges!
When you come to a corner, put your needle in the fabric, lift the foot, and turn the fabric until the foot is lined up with the next edge. It may take some practice to get it to line up just right.
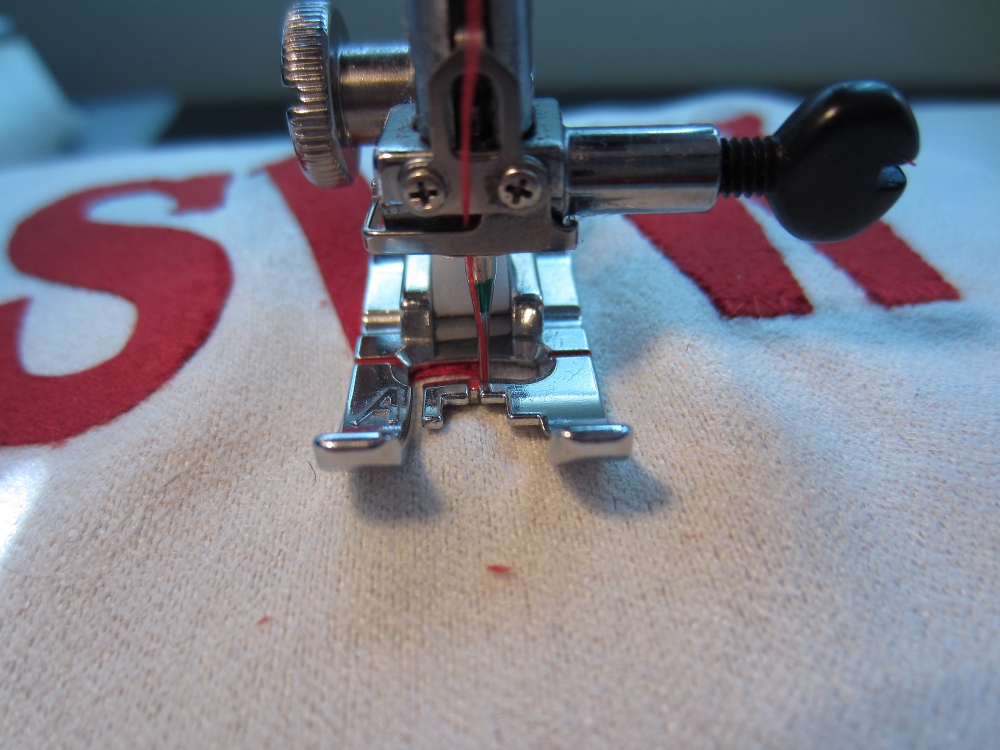

Curves are the trickiest! Depending on how tight the curve is, you'll need to lift the foot and turn the fabric every other stitch or so to keep it lined up properly. Make sure you keep the needle in the fabric every time you lift the pressure foot!
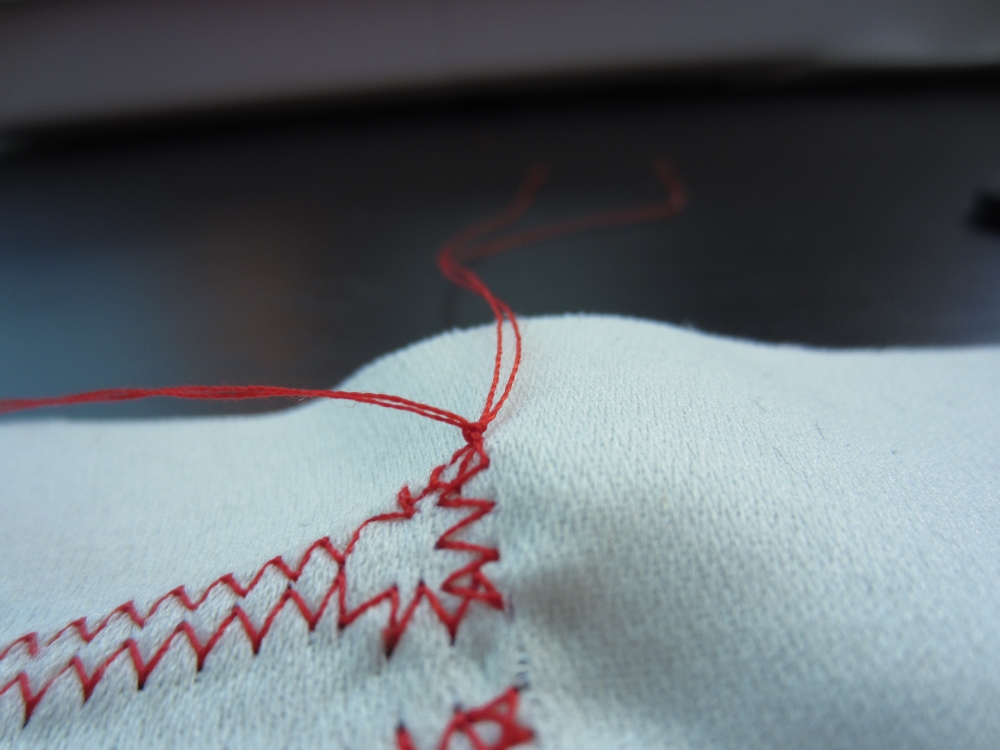
When you come to the end of a letter, turn the fabric over and pull all the threads to the wrong side of the fabric. (This is usually pretty easy if you pull on the trailing thread and use a thread ripper to coax the loop open on the other side. Once you have all 4 threads on the wrong side of the fabric, tie them in a knot to keep your beautiful stitching from coming loose.


Update 7/30/2013:
I've added a few photos to help explain the process a little better. These photos are from a different project you can take a look at here.

No comments:
Post a Comment