

A gallon of almond milk (3 cups of which were turned into ice cream) and 4 cups of almond meal. All this food cost me about the same as I would spend on two half-gallon cartons of almond milk from the grocery store. So, I get a big bag of almond meal for free, peace of mind knowing there are no harmful additives in any of it, plus I think it tastes way better. Beware, this can turn into a very expensive endeavor. Shop around for a good deal on the almonds. You can expect to spend $6-$8 per pound (in California). More than that and you are wasting money.
Start with one pound of raw almonds (roughly 3 cups). Pre-soak them for a day or two in 7 cups of water. When you are ready to use the almonds, drain and rinse them.
Almond Milk
Almond milk is my favorite dairy substitute. It makes wonderful, high-protein smoothies. Its flavor works well for most cooking senarios, too. Use it as a dairy substitute in baked goods or cream-based soups and sauces. You can even use it as a buttermilk substitute by souring it with a touch of white vinegar. It won't curdle like regular milk, as it does not have any emulsifiers added, but the taste and texture are perfectly fine for cooking.
Just be careful using almond milk in recipes that call for large amounts of milk. If you are not used to the nutty flavor, you may not like the results. I find that a little extra salt helps mask the taste in most recipes.
What you need:
1 lb pre-soaked almonds
8-10 cups water
Vanilla, honey, sugar, agave nectar or other flavoring to taste
In batches, blend 2 cups of soaked almonds with 3 to 4 cups water on high for 1 minute.


You can adjust the amount of water depending on personal preference. I like mine thick, but you may prefer a thinner consistency.
Over a large bowl or measuring cup, drape several layers of fine-mesh cheesecloth. (Or invest in a nut milk bag! They run about $10 or less, and they are re-usable. Totally worth it if you plan on doing this often!)

Carefully pour the blended almonds into the cheesecloth and squeeze as much liquid out as you can manage.


Empty the leftover contents of the cheesecloth into a large bowl and set aside.

At this point, you can sweeten or flavor the milk to your liking. If you plan on using it for cooking, it is best to reserve some and keep it plain. For drinking or using on cereal, however, I like to add 1/4 tsp vanilla extract for each cup of milk.
Once all the almonds are blended and strained, I like to pasteurize the milk to keep it from spoiling before I've had a chance to enjoy it all. To do this, pour the milk into a large saucepan and bring to a boil.

Funnel the hot milk into a clean container with a tight lid and chill immediately.

Almond Meal
Almond meal is a wonderful flour substitute for cookie recipes, as well as some breads; pancakes, quickbreads, muffins, brownies, and pie crusts are a few ideas. Just remember, in order to hold your baked goods together, you will need to add cornstarch whenever you use almond meal, or any other gluten-free flour substitute. If you are avoiding gluten in your diet, just be sure to look for gluten-free cornstarch. Even if you are not sensitive to gluten, but you are watching your carb intake, almond meal is still a great ingredient to keep stocked in your kitchen.
In addition to baked goods, I enjoy using almond meal as a breading for chicken. Just add some salt, pepper, and whatever other spices you might fancy. Dip the chicken in egg, and dredge in the almond meal. Works great baked or fried.
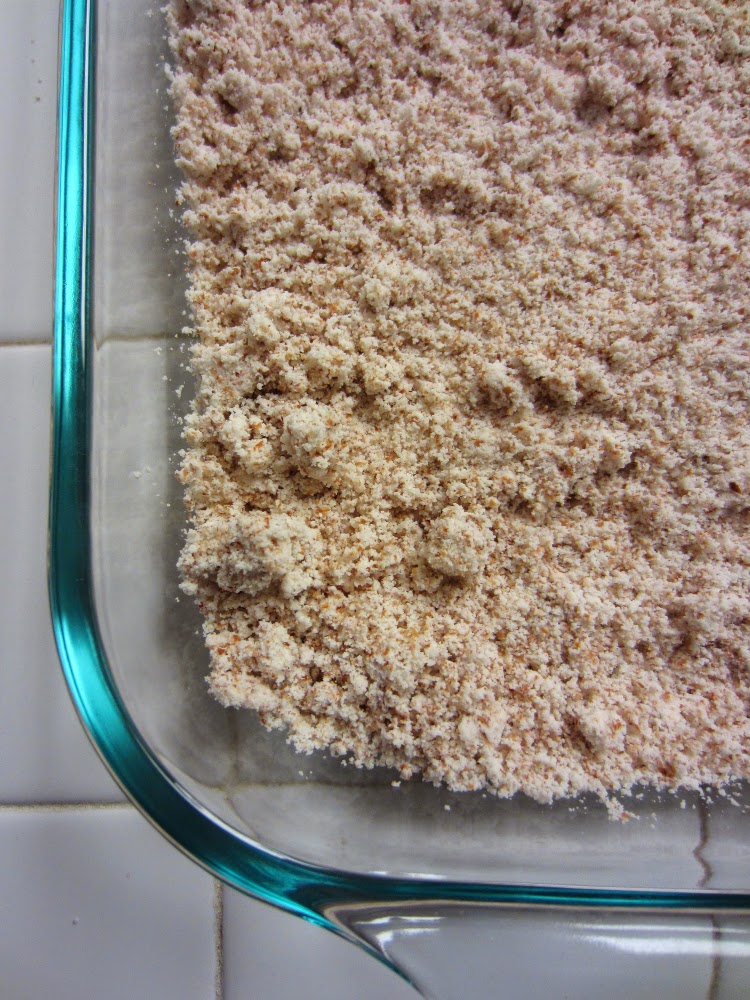
That one pound of raw almonds, blended and strained, makes about four cups of meal.
The almond meal that is leftover after making the milk will be too wet to store and use effectively.

You will need to dehydrate it a little to make it usable. To do this, bake it in a shallow pan at 375° F for 45-60 minutes, stirring at 15 minute intervals.

Let the almond meal cool completely and store in an air-tight container. Almond meal keeps longer in the freezer, but you will need to let it thaw a little before using, as it tends to clump. Don't worry, the clumps are easily broken apart at room temperature. If it gets too lumpy, just give it a few pulses in a food processor before using it.
Check back soon for some great homemade almond ice cream recipes!


