Monday, December 16, 2013

Star Trek Inspired Tea Cozy Part 2: Dome Style Cozy

Last week, I shared a quick tutorial on embroidering text. As promised, I'll now outline an easy way to make a felt, dome-style tea cozy.


First, measure the diameter and height of your teapot. Add an inch or two to allow for seams/wiggle room. Cut two rectangles on the fold of your felt (the fold will be the top of the cozy). Take something round, like a bowl or a plate, and use it to trim the two top corners.


This is what it will look like opened up. You need two of these.

If you are going to embroider anything on the cozy, now is the time. See my previous post on embroidering text.

With both pieces of fabric unfolded, line them up back-to-back. Stitch the two straight edges, leaving about a half inch seam allowance.


Fold it over and finish stitching the edges.


Now trim the seams within a quarter inch of the stitching.


Now make yourself a pot of tea and enjoy your handiwork!

Monday, December 9, 2013

Star Trek Inspired Tea Cozy Part 1: Embroidering Text

I decided last week to make a tea cozy inspired by Captain Picard's famous words: "Tea, Earl Grey, hot." There is nothing better than a hot cup of tea on a cold Winter day like today. The wind is furiously blowing leaves and branches all over the place outside! But I'm nice and warm with my cup of Earl Grey, enjoying the glow of the lights on my little Christmas tree. This is paradise.


This is going to be a two-part tutorial. Today, I'll outline an easy way to embroider text. Next week, I'll share how to make your own dome-style tea cozy.

If your embroidery project requires precision work, you are better off tracing your design using fabric pens. But, if your fabric is difficult to draw on, like the felt I used, the following technique works just fine. First print out a sample of what you want to embroider on regular computer paper. Once you get it sized the way you want, position it on the item and pin the paper in place.


Using a two-ply embroidery thread, outline your text using a split stitch. Here's how:


Make a stitch, then push your needle up through the middle of the stitch you just made. Make another stitch, and repeat this process all the way around each letter. The corners may be tricky to keep in line using the split stitch. Smaller stitches (unlike the ones in the picture above...) are easier to control. You can see that mine got progressively smaller as I progressed. Not great technique, but it has character.


The back will be messy, so plan on adding a lining or backing to your project. 


When you are done stitching, gently tear away the paper. The perforations made from the needle will make this task pretty easy to accomplish.


For the tighter sections (like the middle of the "e" and the "a") you may need to use tweezers to pull the paper bits outs.


This technique will work fine with simple images as well, as long as you are not too worried about fine detail. Stay tuned for step-by-step instructions on how to make your own tea cozy!

Monday, December 2, 2013

Turkey Brine

Thanksgiving is probably my favorite holiday. It's the only day I am allowed to eat as much as I can possibly stuff in and not feel judged for it. This year was my first time hosting Thanksgiving. My first time cooking a turkey on my own, in fact! I know this recipe is a bit late, but that's just how the timing worked out. (I couldn't really post a recipe I hadn't actually tried yet.) I am happy to report that no one got sick, and the turkey tasted great!

Turkey Brine
(Print Recipe)

1 gallon (16 cups) water
1 cup apple cider vinegar
1 cup coarse sea salt
3 tablespoons fresh rosemary
6 cloves minced garlic
2 tbsp peppercorns
6 bay leaves
1 750ml bottle dry white wine

Combine everything but the wine in a large stock pot. Bring just to a boil, then remove from heat. Allow to cool completely.


Meanwhile, get the turkey ready. Remove the giblets and set aside to use for stock. Put the turkey in a basting bag, then place it in a container. A large bucket or bowl will do if you plan on keeping it in the fridge. If it won't fit in the fridge, you can put it in an ice chest, as I did.


Once the brine is cooled, pour it into the bag with the turkey. Next, pour the wine in (I actually used a cheap champagne). Let the turkey marinate for 24 hours, flipping it halfway through.


Remove the turkey from the brine a couple hours before you plan to start roasting it. Discard the brine and rinse the turkey in cool water to remove excess salt. Allow turkey to stand at room temperature for 1-2 hours while you prepare the stuffing and get the oven preheated.

This recipe made for an extremely moist and flavorful bird, well worth any extra time and effort!

Wednesday, November 27, 2013

Red Cabbage and Apples

My husband's family has two Thanksgiving traditions: the super-secret family stuffing recipe, and red cabbage and apples. I never thought I liked cabbage, until I had it prepared this way. It's a family tradition for a very good reason. Tangy, slightly sweet, stains everything it comes in contact with... What's not to love?

Red Cabbage and Apples
(Print Recipe)

1 large head red cabbage
1/2 tsp salt
1/4 tsp pepper
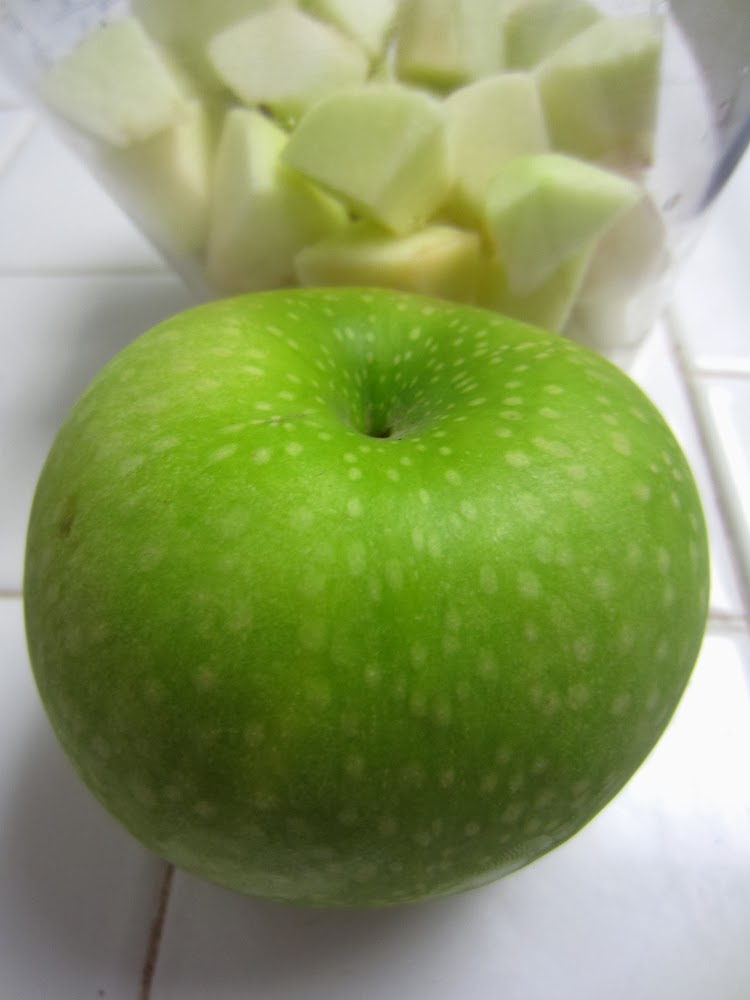
3 sour green apples, peeled and chopped
4 tbsp brown sugar
1/2 tsp cinnamon
3/4 cups white vinegar
6 tbsp butter
1 tsp caraway seed

Cut off the bottom of the cabbage, remove the outer leaves, and discard them. Chop the rest of the cabbage coarsely.


Put it in a stock pot, gently separating the leaves. You may need to pull out more of the tough center.


Cook cabbage with salt and pepper in 1 cup water over low heat for 45 minutes. Meanwhile, peel and chop the apples and soak them in water with a little bit of citric acid to prevent browning.


Add apples and remaining ingredients. Cook 20-30 minutes longer on very low heat, until apples are soft but not too mushy. Serve hot. Will do well in a crock pot on lowest setting for several hours.

Monday, November 18, 2013

Faux Sourdough Pretzel Bread Bowls

Where we live, we don't really get Fall. The weather may turn slightly cooler and we may get a little rain, but it's often difficult to get into the Fall mood when it's 80° and sunny outside most days. So, whenever we get the slightest chill in the air, I have to seize the opportunity to make something hot for dinner.

Soup has been on the menu a lot lately, even when the weather doesn't cooperate completely with my yearnings for cooler weather. Since I'm too impatient for a sourdough starter, I decided to make some faux sourdough bread bowls to go with my various soups. And why not turn them into pretzel rolls while I'm at it?


Faux Sourdough Pretzel Bread Bowls
(Print Recipe)

1 1/2 cups warm water
1 package (2 1/4 tsp) active dry yeast
1 Tbsp brown sugar
6 oz container plain yogurt (I use goat yogurt)
2 tsp salt
1 Tbsp white vinegar
2 1/2 cups all purpose flour
2 cups whole wheat flour
8 cups water for poaching
1/4 cup baking soda
1 egg, lightly beaten
Coarse salt for sprinkling

First, test your water to make sure it's not too hot. My mom always says it should feel like a warm bath: you want the yeast to be comfortable, but you don't want to scald and kill it. Dissolve brown sugar into the water, then sprinkle the yeast on top. Let it stand for 5 minutes. It should get foamy.


Mix in the yogurt, salt, and vinegar. Using a dough hook, mix in the flour 1/2 cup at a time. (I like to use a combination of white and whole wheat flour, but you can do one or the other if you like. If you use all whole wheat, you may need to do a little less flour, and know that it will turn out much denser if you do.) It is ready once it pulls away from the sides of the bowl and forms a ball around the hook.


Coat a large bowl with cooking spray and place the dough in it. Now spray a sheet of cellophane and cover the dough to keep it from forming dry spots. Let it rise in a warm place for 1/2 hour to 45 min, until dough has doubled in size. For this step, I like to preheat the oven to 100° F, then turn it off before I put it in to rise. This keeps it at an ideal temperature to activate the yeast.


When the dough is done rising, pull it out of the oven and preheat it to 425° F. Punch down dough and divide it into 4-6 equal parts, depending on how big you want the bowl. Or, divide more if you just want to make dinner rolls. Form dough into balls as best you can. They will no doubt end up with a seam on the bottom.


Boil 8 cups of water. Remove from heat and slowly add baking soda to the water. Place back on heat. Drop in the rolls one at a time (if you are doing smaller rolls, go ahead and do 3 or 4 at a time). Poach for 30 seconds on each side.


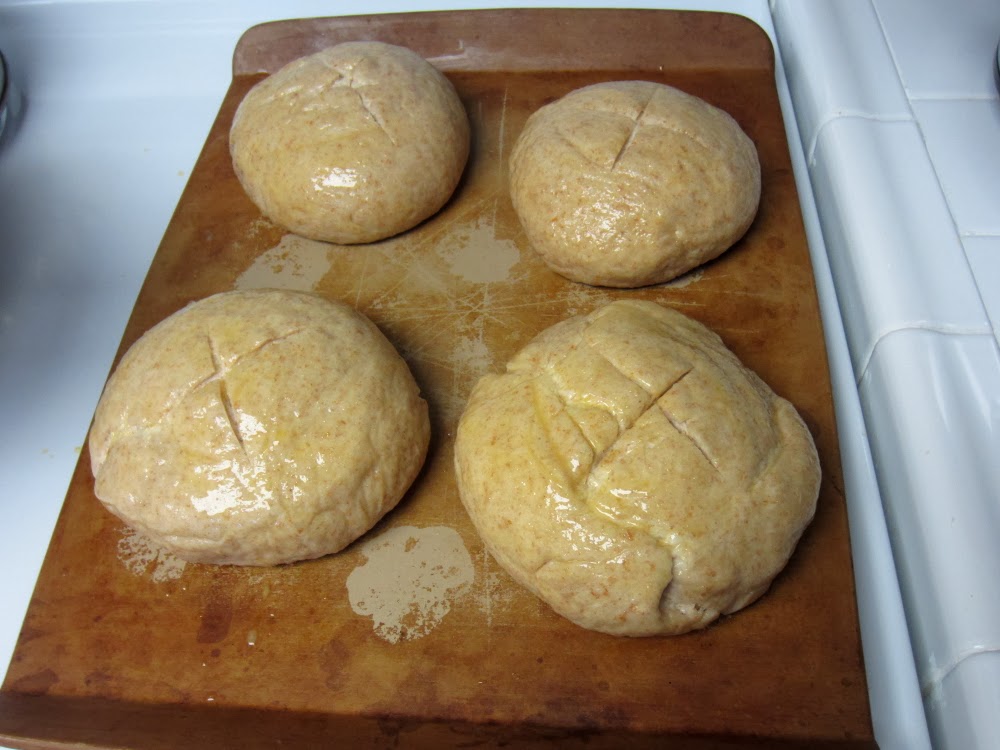
Place poached rolls on a baking sheet and score the tops. Brush with egg and sprinkle with coarse salt. (I actually did not have any coarse salt, so I just used a little table salt. It disappeared, sadly.)


Bake at 425° F for about 20 minutes, until golden brown.


Cut a hole in the top and serve with your favorite soup or chili. Or make them slightly smaller and use them as sandwich rolls.

 Delicious!

Monday, November 11, 2013

Kuribo's Shoe Pixel Art Christmas Stocking

As I've mentioned, my husband is a Super Mario Bros. wizard. His idea of a relaxing evening is making a speed-run through Mario 2.

Last Christmas, we decided it was time to make him a stocking to replace the one with a teddy bear on it that his mom loaned to us. After a year of trial and error, I am finally satisfied with the end result! It's based on Kuribo's Shoe from Mario 3 (you know, that cool green boot that you get to hop around in). I added a Santa hat to make it more holiday-appropriate, and voila!


I went through so many different versions of this, I've lost count. I'll spare you the details and just say that I ended up hand-stitching each felt "pixel" in place, then hand-stitching the lining and backing as well.

I spent a couple days just cutting out 1/4 inch felt squares.
I drew up the design on graph paper before attempting to piece it together.
I used embroidery thread to attach each pixel. I quite like how it turned out.

I am offering these for sale on Etsy, though it may take me some extra time to process any orders. This ended up being a fairly time-consuming project. Now my husband wants a matching stocking with Mario in a pipe! I think it's a great idea.

Monday, November 4, 2013

Toasted Pumpkin Seed Recipes

Last week, we had our annual pumpkin carving party. (See my previous post for some Jack-O'-Lantern patterns.) With 9 people carving pumpkins, we ended up with a boat load of seeds. We toasted three different batches, each with different seasonings. With some slight modifications (the spicy wasn't spicy enough, and the sweet wasn't sweet enough on the first go), here is what we ended up doing.

I was trying to muti-task and forgot to take pictures of all three batches. By the time I remembered, the first two batches were already eaten. So, I only got pictures of the Sriracha seeds. You get the idea, though.

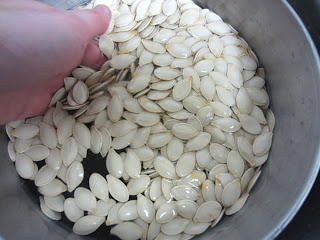
So, the first step is to rinse the seeds. I first tried to accomplish this in a colander and found that the stringy pumpkin bits stuck to everything. It was actually easier to put them in a big bowl and fill it with water. Most of the unwanted gunk sank to the bottom of the bowl, and I was able to fish out the remaining stringy bits easily.


Once they are rinsed, the seeds are easily skimmed off the water and into a measuring cup. I calculated the following recipes for 1 cup of pumpkin seeds, so they are easily scaled to whatever quantity you end up with after having carved your pumpkin(s).

A few more tips!

It is best if you bake these on a baking sheet with sides, as it makes it much easier to stir them.

Though I believe these are best served warm and fresh, you can store them in an airtight container for up to 2 weeks. I've found that they start to get chewy after that. You can try to keep them in the fridge if you want to make them last longer.

Lastly, don't seal them in your airtight container until they are completely cooled; otherwise, they will steam themselves and lose that satisfying crunch.


Sriracha Pumpkin Seeds
(Print Recipe)


Per 1 cup fresh pumpkin seeds:
2 tbsp melted butter
1 1/2 tsp sriracha
1/2 tsp garlic salt
cayenne pepper to taste (recommend 1/8-1/4 tsp)

Rinse seeds in a bowl of cold water. Drain on paper towels. Spread seeds on a baking sheet. Mix the melted butter, sriracha, and garlic salt in a small bowl and pour the mixture over the seeds.


Toss to coat. Sprinkle the cayenne pepper over the seeds. Toast them at 375° for approx. 15 minutes, or until golden brown.


Stir them every 5 minutes or so to toast them evenly.


Classic Savory Pumpkin Seeds
(Print Recipe)

Per 1 cup fresh pumpkin seeds:
2 tbsp melted butter
2 tsp worcestershire sauce
1 tsp garlic salt
1/4 tsp table salt (or seasoned salt if you prefer)

Rinse seeds in a bowl of cold water. Drain on paper towels. Spread seeds on a baking sheet. Mix the melted butter, worcestershire sauce, and seasonings in a small bowl and pour the mixture over the seeds. Toss to coat. Toast them at 375° for approx. 15 minutes, or until golden brown. Stir them every 5 minutes or so to toast them evenly.


Sugar and Spice Pumpkin Seeds
(Print Recipe)

Per 1 cup fresh pumpkin seeds:
2 tbsp melted butter
1 tbsp granulated sugar
1 tsp ground cinnamon
1/4 tsp nutmeg
1/4 tsp allspice

Rinse seeds in a bowl of cold water. Drain on paper towels. Spread seeds on a baking sheet. Mix the melted butter and sugar in a small bowl and pour the mixture over the seeds. Toss to coat. Mix the spices in a small bowl and sprinkle over the seeds. Toast them at 375° for approx. 15 minutes, or until golden brown. Stir them every 5 minutes or so to toast them evenly.

Monday, October 28, 2013

Video Game Character Jack-O'-Lanterns

It's pumpkin time! This weekend, we gathered all our old friends together for a pumpkin carving party. This is the third year running that we have hosted this ritual. We eat, we drink, we carve, we eat, we play games, we eat some more.
I just want to throw in a word about the Wii U here. Last Christmas, we decided to buy one, even though we never buy consoles or games right at release. We usually wait to see if we can get a good price on a used one. That said, the Wii U has been pretty awesome. Then again, they only had a couple of games worth playing for the longest time. Just in the past month or so, there has been an explosion of new games. So, almost a full year after we bought the console, we finally bought a new game: Rayman Legends! Up to five people can play at once, so it is perfect for big groups. With so much going on on screen, and everyone bumping into each other constantly, the irritation level is up there with Super Mario Bros Wii (or Super Frustration Bros, as my husband has nicknamed it). I'm sure our neighbors did not appreciate all the yelling and cursing at such a late hour. But we had tons of fun. As far as I am aware, all who played are still on friendly terms.

Now for the fun, holiday-related content! All the pumpkins were awesome. I have some really talented (or warped) friends.


I carved a couple of pumpkins with some classic video game characters (along the lines of the silhouettes I made in a previous post). I went ahead and made some patterns out of my favorites.


Feel free to use these patterns on your own pumpkins. Happy carving!
*Note: more patterns will be available soon, as soon as I get my scanner working properly!

Monday, October 21, 2013

Pumpkin Banana Bread

I have been baking like mad lately, so please excuse all the recipe posts. Fall is the best time for baking, even if it's sunny and 80 degrees outside. I can't help but share these tasty concoctions I've put together!

My mother always says there is no such thing as a bad banana. You might think otherwise when you see the bananas I bought last week and failed to eat:


With mother's words echoing in my brain, I just couldn't bring myself to dispose of these bananas. I've never been great at making banana bread, though; it always turns out dry and heavy. I do, however, have a great recipe for pumpkin bread. So, naturally, I decided to adapt that recipe to include my beautifully ripened bananas.


Pumpkin Banana Bread 
(Print Recipe)

2 medium, incredibly ripe bananas, mashed
1 15 oz. can pumpkin pureƩ
4 eggs
2 cups sugar
1 cup vegetable oil
1/2 cup water
4 cups flour
2 tsp baking soda
1 1/2 tsp salt
1 tsp cinnamon
1 tsp nutmeg
1/2 tsp cloves
1/2 tsp ginger
1 cup chopped walnuts or pecans (optional)

Start by greasing and flouring some loaf pans. This actually made a lot more than I anticipated, so I ended up making half a dozen jumbo muffins in addition to the 4 mini loaves I originally intended to make. I'd say you could probably choose from the following:
18 jumbo muffins
6 6"x3" loaves
3 9"x"5" loaves

Squish your bananas and pumpkin together in a large mixing bowl. Mix in the eggs one at a time. Add in the sugar, then the oil and water. In a separate bowl, stir together the flour, baking soda, salt, and spices. Add the dry ingredients to the pumpkin mixture, along with the nuts, and stir until just combined.


Spoon the batter into your prepared pans, filling them about 2/3 full. Bake at 350° F, 30-40 minutes for muffins, or 45-60 minutes for loaves. Test with a toothpick, and let them cool on wire racks when done.


This recipe turned out moist and full of that Fall flavor I've been craving. Since it made more than my husband and I could hope to eat ourselves, I went ahead and wrapped a few of these puppies up and sent them off to various family members.